Typing 项目技术总结 - 字符输入逻辑
地址:https://typing.yasinchan.com
源码:https://github.com/YasinChan/typing
字符输入是整个 Typing 最核心的模块,主要逻辑都集中在 WordInput.vue。
整体上涉及以下几个部分:
- 文案渲染
- 输入框
- 文案与输入内容的绑定
- 限时、计时、自定义三种模式下的特定逻辑与输入组件的衔接
- 其他个性化功能
文案渲染
文案统一存放在一个 JSON 文件 中,结构如下:
{
  "long": [
    {
      "title": "title",
      "author": "author",
      "type": "散文",
      "length": "long",
      "content": "xxx"
    }
  ],
  "medium": [
    {
      "title": "title",
      "author": "author",
      "type": "散文",
      "length": "medium",
      "content": "content"
    }
  ],
  "short": [
    {
      "title": "title",
      "author": "author",
      "type": "片段",
      "length": "short",
      "content": "content"
    }
  ]
}
可以看到,文案被分成了长、中、短三种长度,方便用户按需选择。
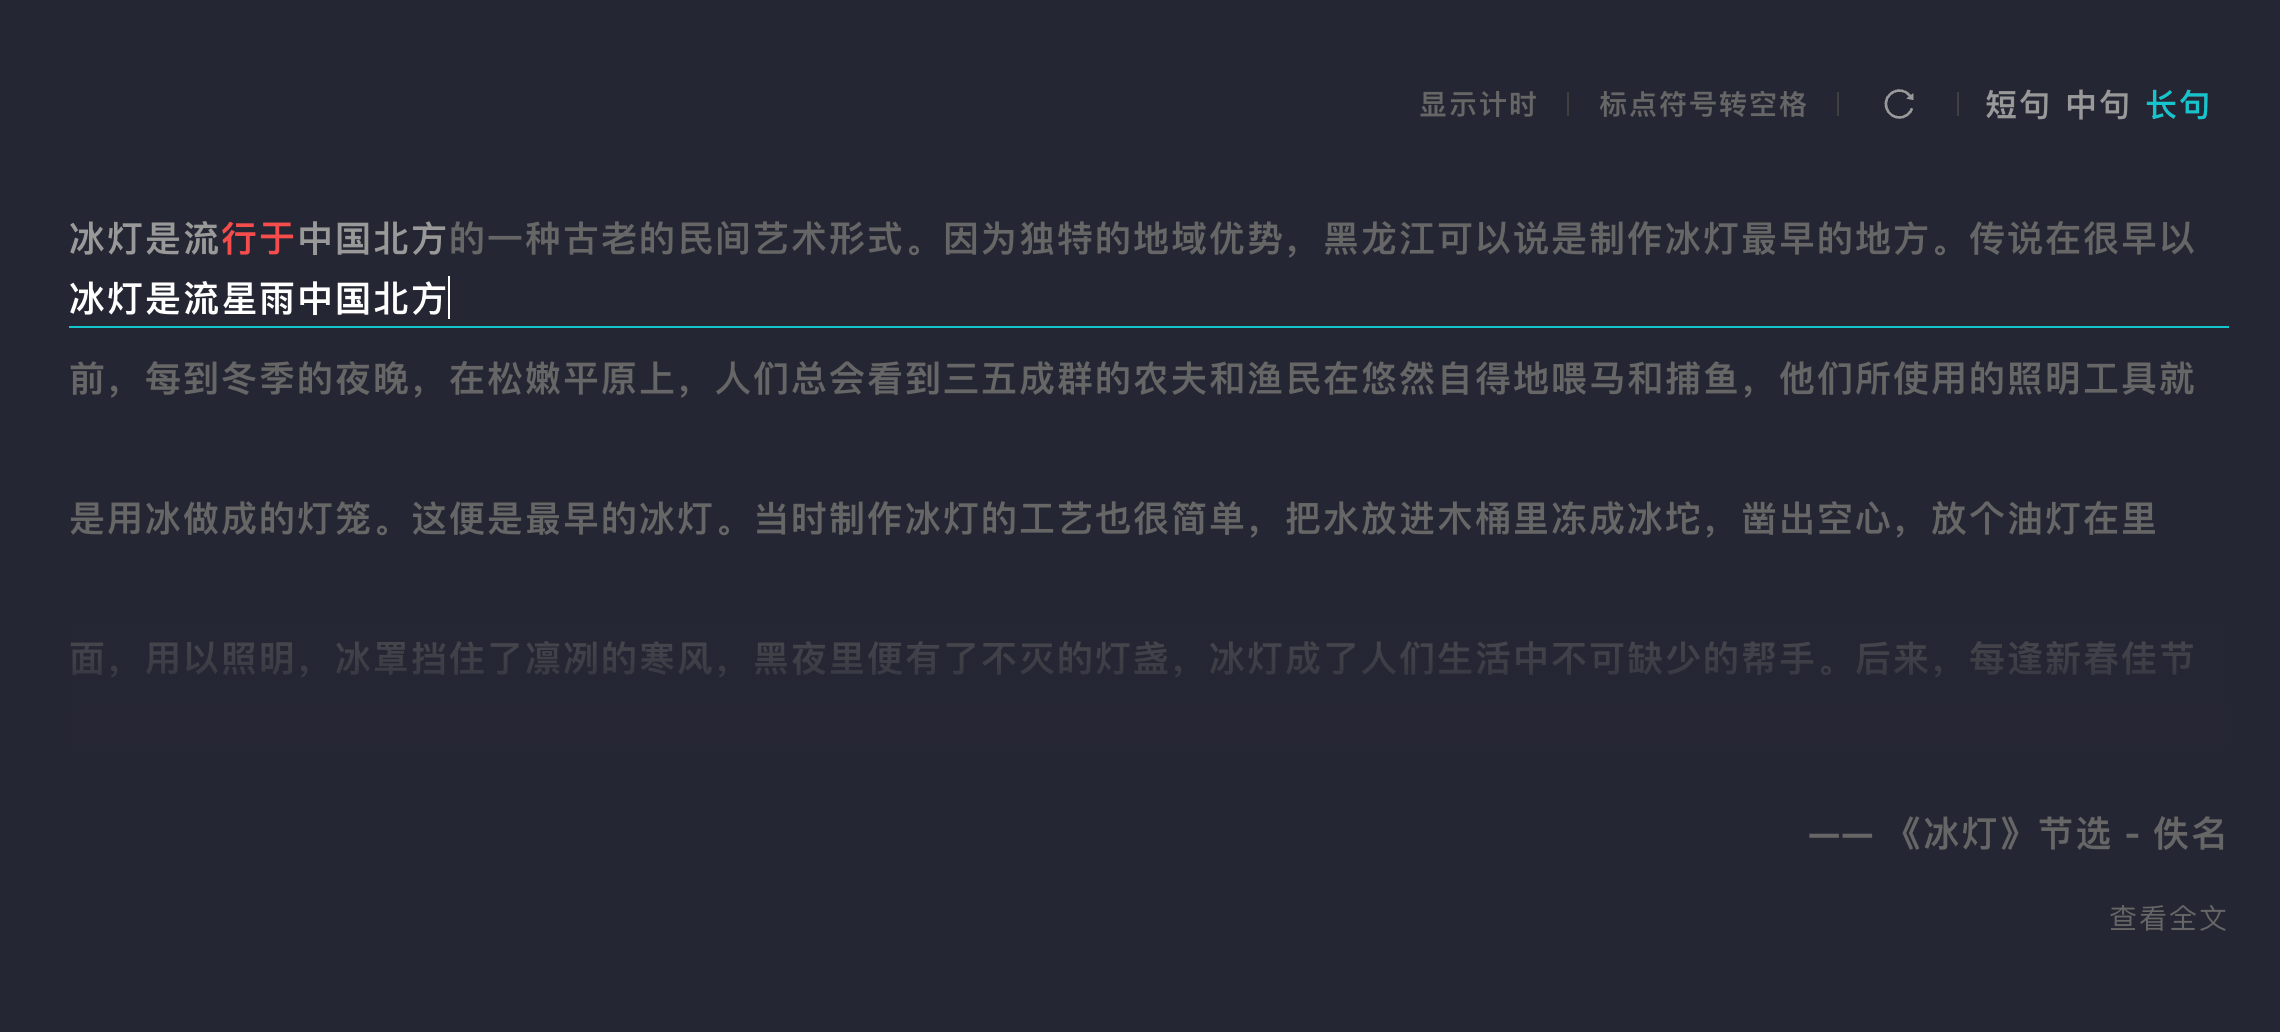
在此基础上,输入过程中需要记录每个字的状态——已输入、输入错误、还未输入——并实时反映到文案上。这意味着文案里的每个字都需要被单独控制,所以渲染时为每个字都包了一层 <span>,完整代码在这里:
<!-- vue template 语法-->
<div class="y-word-input__quote">
  <span
    v-for="item in state.quoteArr"
    :class="[item.isWrong ? 'is-wrong' : '', item.isInput ? 'is-input' : '']"
    :key="item.id"
    >{{ item.word }}</span
  >
</div>
每个字都被 <span> 包裹后,就可以通过 is-wrong、is-input 这两个 class 来呈现不同状态的样式。
输入框
输入框基于 div[contenteditable] 实现。它和上面渲染的文案统一使用 line-height: 70px,再通过绝对定位的方式层叠在一起,让输入内容刚好落在文案的行间距里,从而实现流畅的换行效果。
<div
  ref="inputAreaRef"
  @paste="pasteEvent"
  @keydown="keyDownEvent"
  @input="inputEvent"
  @mousedown.prevent="mouseDownEvent"
  @mouseup.prevent
  @beforeinput="beforeInputEvent"
  @compositionstart="compositionStartEvent"
  @compositionupdate="compositionUpdateEvent"
  @compositionend="compositionEndEvent"
  class="y-word-input__input-area"
  contenteditable="true"
></div>
这里绑定了很多事件,目的主要有两点:
- 监听输入事件,记录内容,用于错误统计和回放功能;
- 禁用粘贴、撤销、反撤销、键盘选中等事件,避免干扰输入。
在展开第一点前,先简单介绍一下 CompositionEvent 和 beforeinput。
CompositionEvent 与 beforeinput
DOM 接口
CompositionEvent表示用户间接输入文本(如使用输入法)时发生的事件。此接口的常用事件有compositionstart,compositionupdate和compositionend
简单来说,搜狗这类 IME(输入法编辑器)会把键盘上的字母组合成中文。在使用 IME 输入时,浏览器会触发一组 CompositionEvent 事件:
- 开始输入组合字符时,触发
compositionstart; - 输入过程中持续触发
compositionupdate; - 输入完成(比如按下空格或回车)时,触发
compositionend。
DOM 事件
beforeinput在[<input>],<select>或<textarea>的值即将被修改前触发。这个事件也可以在contenteditable被设置为true的元素和打开designMode后的任何元素上被触发。
也就是说,输入字符在被实际渲染到浏览器之前会触发 beforeinput。这个事件常被用作现代富文本编辑器(如 slate)的核心事件。
记录输入用于错误统计和回放
这个功能在下一篇文章中会详细展开,这里先简要说一下相关逻辑。
除了中英文本身,我们还需要记录 composition 状态下的英文。用到的事件包括 input、beforeinput、compositionstart、compositionupdate、compositionend:英文输入通过 input 记录,中文输入在 compositionend 中记录,而 composition 状态下的英文则通过 CompositionEvent 结合 beforeinput 来记录。
function beforeInputEvent(e: any) {
  state.isTyping = true;
  if (e.inputType === 'insertCompositionText') {
    if (compositionList.includes(e.data)) {
      return;
    }
    // 处于 composition 状态
    if (state.currentComposition === e.data || !/\w+/.test(e.data)) {
      // 这里是 composition 状态结束的条件,比如按了空格、回车。
      state.isComposing = false;
      state.currentComposition = '';
      return;
    }
    state.currentComposition = e.data;
    return;
  }

  if (e.inputType === 'deleteContentBackward') {
    if (state.currentComposition) {
      // 如果在 composition 状态下鼠标点了旁边,这时 composition 状态下的输入会被删除,此时只需要将 currentComposition 清空即可。
      state.currentComposition = '';
      return;
    }
    return;
  }
}
此外,还定义了两个列表,用于在输入过程中做一些特殊字符过滤:
const whiteList = ['”', '》', '}', ')', '】', '’']; // 白名单,这些字符不会被标记为错误
const compositionList = ['“”', '《》', '{}', '()', '【】', '‘’']; // composition 状态下的字符
禁用部分输入和键盘事件,避免干扰
回到前面提到的第二点:为了确保输入过程不被其他操作干扰,这里禁用了粘贴、选择等事件。
function pasteEvent(e: ClipboardEvent) {
  e.preventDefault();
}
function keyDownEvent(e: KeyboardEvent) {
  emit('keydown-event', e);
  if (e.code === KEY_CODE_ENUM['ENTER']) {
    e.preventDefault();
  }
  if (!props.isSpaceType && !props.canSpace && e.code === KEY_CODE_ENUM['SPACE']) {
    e.preventDefault();
  }
  if (
    e.shiftKey &&
    (e.code === KEY_CODE_ENUM['ARROW_LEFT'] || e.key === KEY_CODE_ENUM['ARROW_RIGHT'])
  ) {
    // shift + 左右方向键禁止
    e.preventDefault();
  }
  if ((e.metaKey || e.ctrlKey) && e.code === KEY_CODE_ENUM['KEY_A']) {
    // ctrl + a 禁止 或者 command + a 禁止
    e.preventDefault();
  }
  if ((e.metaKey || e.ctrlKey) && e.code === KEY_CODE_ENUM['KEY_Z']) {
    // ctrl + z 禁止 或者 command + z 禁止
    e.preventDefault();
  }
  if ((e.metaKey || e.ctrlKey) && e.code === KEY_CODE_ENUM['BACKSPACE']) {
    // ctrl + back space 禁止 或者 command + back space 禁止
    e.preventDefault();
  }
}
同时通过禁用 mouse 相关事件,把鼠标选择也屏蔽掉:
@mousedown.prevent @mouseup.prevent
不过这样会带来一个副作用:输入框失焦后,无法再通过鼠标点击重新 focus。因此还需要在 mousedown 中手动补一段聚焦逻辑:
function focusInput() {
  if (!inputAreaRef.value) return;
  inputAreaRef.value.focus();
  moveCaretToEnd(inputAreaRef.value);
}

function moveCaretToEnd(element: HTMLElement) {
  // 使光标移动到末尾
  if (document.createRange && window.getSelection) {
    const range = document.createRange();
    const selection = window.getSelection();
    range.selectNodeContents(element);
    range.collapse(false);
    selection && selection.removeAllRanges();
    selection && selection.addRange(range);
    // @ts-ignore
  } else if (document.body.createTextRange) {
    // For older IE
    // @ts-ignore
    const range = document.body.createTextRange();
    range.moveToElementText(element);
    range.collapse(false);
    range.select();
  }
}
这样点击输入框时,光标会直接定位到末尾。
文案与输入内容绑定
前面用于渲染文案的数据结构如下:
type SentenceArrItem = {
  id: number;
  word: string;
  isInput: boolean;
  isWrong: boolean;
};

const state = reactive({
  ...
  quoteArr: [] as SentenceArrItem[],
  ...
});
input、beforeinput、composition 等事件触发时会改变 state.inputText 的内容:
watch(
  () => state.inputText,
  (newVal) => {
    const inputTextArr = newVal.split('');
    const wrongPos: number[] = [];
    state.quoteArr.forEach((item, index) => {
      item.isInput = false;
      item.isWrong = false;
      if (inputTextArr[index]) {
        item.isInput = true;
        item.isWrong = item.word !== inputTextArr[index];
        if (item.isWrong) {
          wrongPos.push(index);
        }
        if (whiteList.includes(inputTextArr[index])) {
          item.isInput = item.word === inputTextArr[index];
          item.isWrong = false;
        }
      }
    });
    ...
  }
);
然后通过 watch 监听 state.inputText,在回调中改变 state.quoteArr,最终触发文案渲染的更新。
三种模式的特定逻辑与组件绑定
在完成以上功能后,组件会在不同阶段 emit 出一些事件,供外层业务逻辑使用:
const emit = defineEmits(['is-typing', 'keydown-event', 'is-finished']);
业务逻辑里需要注意:在页面切换时要及时销毁定时器,避免内存泄漏。
三种模式都有刷新文案的功能,逻辑很简单——只要保证刷新后的结果与当前文案不同即可。不过计时模式下的短句类型有些不同,它每次刷新需要从数组中随机抽五条出来,这里我用了 Fisher-Yates 洗牌算法。
Fisher-Yates 洗牌算法
该算法的核心思想是:
- 从数组的最后一个元素开始,向前遍历;
- 对每一个元素,在当前索引(含)与数组末尾之间生成一个随机索引;
- 把当前元素和随机索引指向的元素交换位置;
- 重复直到遍历到第一个元素为止。
对应的具体实现如下:
function getRandom() {
  const array = Object.values(Sentence[state.type]);
  ...
  if (array.length < state.len) {
    throw new Error('The array length should be at least 5');
  }

  // 创建一个包含原数组所有索引的数组
  const indices = Array.from({ length: array.length }, (_, i) => i);

  // 使用 Fisher-Yates 洗牌算法打乱索引数组
  for (let i = indices.length - 1; i > 0; i--) {
    const j = Math.floor(Math.random() * (i + 1));
    [indices[i], indices[j]] = [indices[j], indices[i]];
  }

  // 选取前 length 个随机索引,并从原数组中获取对应元素
  return indices.slice(0, state.len).map((index) => array[index]);
  ...
}
上传文档
自定义模式下的上传文档也值得单独说一下。需要注意:前端本身不具备解析或展示 .doc 等富文本格式的能力,目前只能读取 .txt 这种纯文本格式的内容。所以这里借助 input[type=file]:
<input ref="uploadFile" type="file" accept=".txt" @change="handleFileChange" />
配合 FileReader 来读取 .txt:
function handleFileChange(event: any) {
  const selectedFile = event.target.files[0];
  if (selectedFile && ['text/plain'].includes(selectedFile.type)) {
    const file = selectedFile;

    // 预览文本文件前 1000 个字符
    if (['text/plain'].includes(selectedFile.type)) {
      const reader = new FileReader();
      reader.onload = () => {
        state.customInfo = reader.result?.slice(0, 1000) as string;
      };
      if (file) {
        reader.readAsText(file);
      }
    }
  } else {
    alert('请选择支持的文件类型!');
  }
}
其他个性化功能逻辑
标点符号与空格的相互转换
现在很多人主要的键盘输入场景是聊天框,习惯用空格代替标点符号。因此三种模式下都提供了标点和空格的互转功能,更贴合中文用户的输入习惯。
借助正则就能完成转换:
function replacePunctuationWithSpace(input: string): string {
  const punctuationRegex = /[.,;:!?(){}[\]\\/'"`“”‘’…—~,《》「」【】·、。!?;:]/gu; // 匹配大多数常见标点符号
  return input.replace(punctuationRegex, ' ').replace(/\s+/g, ' '); // 连续空格替换为一个空格
}
异常情况处理
项目上线后,排行榜出现过被刷屏和刷数据的情况,针对这些异常我做了如下处理。
刷数据
排行榜曾被大量无效用户 ID 刷屏。为此,我在保存排行榜数据的接口前加了一层中间件,校验用户名和用户 ID 是否一致,以此验证用户身份的真实性。
此外还遇到过明显离谱的数据,这里暂时只能把数据限制在一个合理范围内,超出范围则会直接报错。
刷屏
这里使用了 koa2-ratelimit,根据 IP 地址限制提交频次:
const RateLimit = require('koa2-ratelimit').RateLimit;

const postSave = RateLimit.middleware({
  interval: 30000,
  max: 1, // limit each IP to 1 requests per 30s
  message: "提交太频繁啦,30 秒之后再试吧!",
  prefixKey: 'xxxx'
});